Cinnamon Pull Apart Bread  

Posted by: anna* in , ,

Here´s some yeasty awesomeness: I used this recipe from over at Joy the Baker and it worked great so: use it. Not hard to do (as usual), very handsome and incredibly yummy! I didn´t even have to alter anything, really. I thought about using the yeast dice you usually gt over here instead of the dry yeast but then decided against it and stick to the recipe. It was my first time using dry yeast and I was happy with it.


Yeast dough always reminds me of my early childhood where my grandma used to make a lot of sweets with yeast dough. I loved sneaking into the kitchen, stealing little pieces of the lukewarm dough, I loved the smell of it and everything my grandma made from it. And this Pull Apart Bread is pure love, too. Go ahead, make it!

Ingrediences:
For the Dough:
2 3/4 Cups all purpose Flour (330gr)
1/4 Cup Sugar (55 gr)
2 1/4 ts Active Dry Yeast
1/2 ts Salt
2 ounces Butter (60gr)
1/3 Cup Milk
1/4 Cup Water
2 large Eggs (at roomtemperature)
1 ts Vanilla extract

For the "Filling":
1 Cup Sugar (220gr)
2 ts ground Cinnamon
1/2 ts ground Nutmeg
2 ounces Butter (60gr)

If you need a converter for cooking measurements these are the ones I usually use:
convert-me.com , onlineconversion.com and for germans: usa-kulinarisch.de


Here we go:

Mix 2 Cups of flour, the yeast, salt and sugar for the dough in a bowl and set aside.
Whisk the eggs together and set aside, too.
Warm up the milk (no cooking needed) and let the butter melt in it.
Add the water and the vanilla extract to the mil and butter.
Let it cool down to about 50°C/115-125°F. For me that didn´t mean letting it cool down because it never got that hot in the first place. I´m used to handling things lukewarm when dealing with yeast.

Now the milk mixture goes into the flour mixture. Joy says to mix with a spatula. But remembering my hate of floury hands I used the handmixer. Worked great.
Add the eggs. That´s what I call gooey. It really takes a minute or two to get everything mixed together and then it looks... well... not pretty.
Add the remaining flour, mix and let the very sticky dough rest for about an hour. Make sure it´s covered and in a nice warm place. On a sunshiny day I put my dough on the windowsill and hope that someone walks by and thinks "Oooh! Dough! Nice!" Never happens because I live on the fourth floor...


While the dough rose I watched cartoons. I can recommend that.
<-- Dough before rising.


An hour later:
Put together the sugar, nutmeg and cinnamon for the filling.
Butter your cakepan. Let the butter melt and get a bit brown. Watch out because butter is a bitch: it refuses to get brown when you watch. You look away and suddenly it´s all black...

<-- Dough after rising.
Deflate the dough by kneading it. Add two tablespoons of flour to it to get rid of the stickiness.


Let it rise for another 5 mins.


As usual I didn´t flour my work surface but used baking paper to roll out the dough. Try to make it rectangle shaped if you can. I couldn´t.


Butter it. It´s easiest with a pastry brush.


Then sprinkle all the sugar mix over it. It doesn´t look like much when you´ve got in in a little bowl but it seems like and endless supply when you´re sprinkling... I actually didn´t use all of it. I thought the dough would die of diabetes...

Cut the dough into stripes. Joy made six, I only made 5 and those weren´t particularly good looking. Or evenly shaped. Or anything else.


Stack the stripes, then cut them into little piles. I made six piles. I thought I´d never fill the pan with this...


But I did. Put the stacks/piles into your cake pan. Set it aside and let it rise for another 30-45mins. It´s supposed to double it´s size but it didn´t. It did rise notably, though so I figured it`s be ok.


Sugary, yeasty pull-apart-leaves to be...


Let it bake for about 45min at 175°C/ 350°F. I think it took me a while longer because my oven sucks. But: Make sure the top is a yummy golden brown. Yeast doughs are tricky and they can look good on the outside while still all gooey on the inside.


Mmmh, yum! It does taste good the day after but certainly is most amazing when its fresh. Just let it rest after baking for about half an hour, then eat. Yes, it is pretty buttery but... who cares!


Easy Apple Pie  

Posted by: anna* in , , ,

It´s weekend, fun time. And I´m sick. Instead of having fun, I´ll stay in. So I might as well tell the world about some cake I made. 
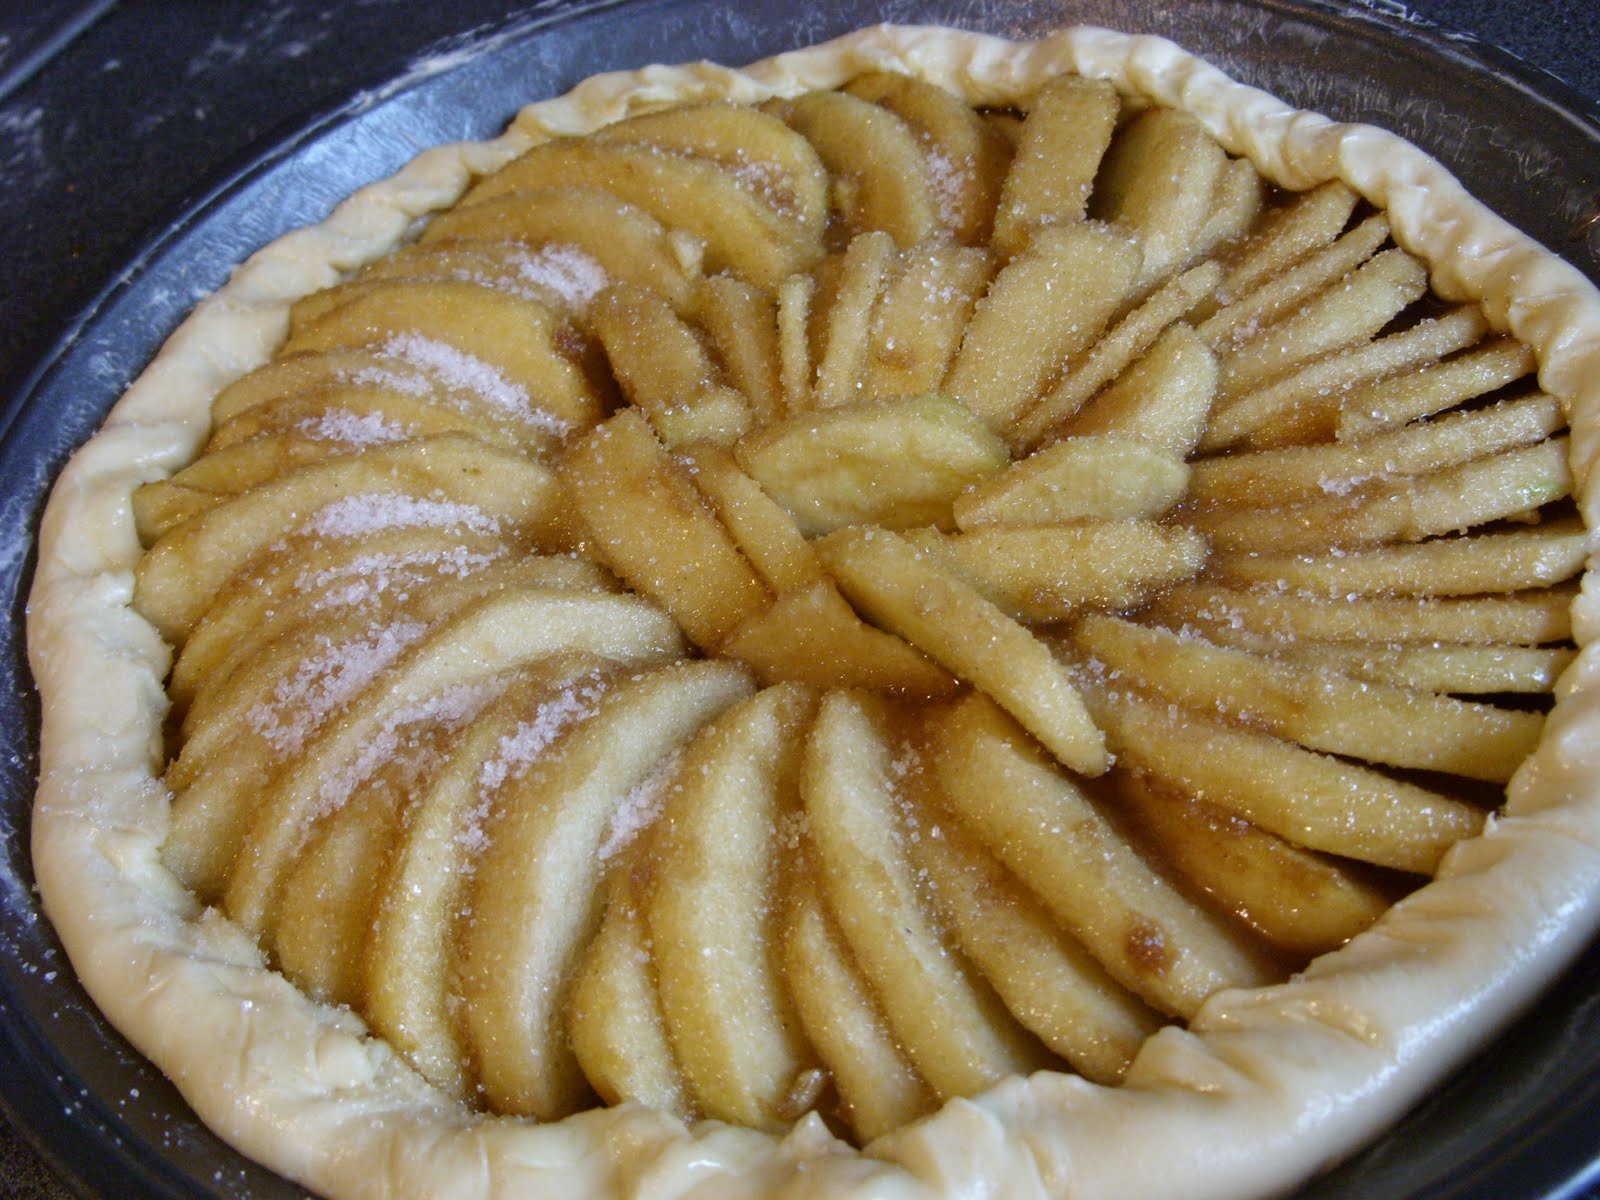
It´s Apple Pie. Original recipe by me. Because I didn´t like the ones I found. Whoohoo!

Ingrediences
for the crust:
250g Flour
175g Margarine
6 TS Ice cold water
1 Egg
a pinch of salt

Filling:

6-8 Apples (I usually take at least two different kinds, sweet and sour)
2 TS Lemonjuice
2 TS Syrup (of any kind. Because Maple syrup is ridiculously expensive over here I use sugar beet molasses because thát´s pretty german, yummy and easy to find.)
100g white Sugar
150g brown Sugar
1 TS ground cinnamon
1 TS Starch
Butter


For the crust mix flour and salt, in little pieces add the margarine. Mix with hands or the handmixer until it´s pretty crumbles. Me I use the machine because I hate, hate, hate the feeling of flour on my hands. Same goes for sand and dry dirt...


Mix the egg with the ice cold water then mix the eggwater with the flour.


It should be a sticky, very soft dough by now. If it´s too sticky, add flour. Stickiness depends on how big the spoon was you measured the water with so... The same goes for the other way around. If it´s too dry and still crumbles, add water.


Now make a pretty ball, divide it in too, wrap in foil and put into the fridge. I usually put my dough into the freezer for 10-15mins, just to make sure it´s all cold and not that soft anymore.


Now for the filling.


Peel the apples if you like, cut them into pieces. If you´re covering your Pie, make them small. This time I didn´t cover it so I just sliced the apples for prettiness.


Put apples into a bowl. Add lemonjuice and syrup. Mix well.

Now add both sugars, cinnamon and the starch. Mix well again.


Butter the Piepan.


Now get the dough out of the fridge. Roll it out. You´ll need two big dough circles.
I usually roll my dough out between baking paper. Again this is because I hate flour on my hands. And I hate cleaning. Using paper keeps my kitchen clean.

It´s also pretty easy to make the second doughcircle as big as the first one because the margerine leaves marks on the paper.


Now put the first doughcircle into a piepan. Or a tarte-pan. Something round looks best, I guess. Poke it a few times with a fork.


But the apples in. If you´re covering the pie make the the apple pile a bit higher towards the middle. Put some little butterflakes on top if you want it extra juicy.


If you want to you can cut out little shapes from the cover layer. I´d absolutely recommend cutting some kinds of holes into it because if you don´t the pie might end up looking like a blow fish because of the hot air and stuff from the filling. I like butterflies.

Put the second doughcircle on top and pinch the two dough layers together. It´s not yummier when it´s pretty. But, well, it´s prettier. If you´re not covering the pie, just tug the apples in and pinch the dough in shape.


Now brush the cover (or just the apples) with some butter, sprinkle it with sugar and into the oven it goes.


Bake for 10mins at 225°C then for 40-45mins at 180°C.
Done. Tastes heavenly fresh out of the oven with vanilla ice cream.


And gone pretty fast, too.